


Alright ladies I need you all to "Like" my Perfect {Printables} facebook page and share with your friends!! Here is a list of items that I offer....so far :)
* Shower Invitations
* Party Invitations
* Stationary
* Cupcake Toppers
* Banners
* Party Packages
* Water Bottle Labels
* Birth Announcements
* Baby Announcement Wall Art
* Address Labels
* Thank you Cards
* Party Signs
* Moving Announcements
* Christmas Cards
* Teacher Printables
* Recipe Binder Printables
Please visit my facebook page for examples of each or you can also find me on Instagram
Friday, July 20, 2012
Wednesday, June 13, 2012
The Honeymooners do Atlanta
So on our honeymoon 2 years ago, I can't believe it has been that long, we met 3 amazing couples. Now going into our honeymoon I told DJ that this was our trip and it was just going to be us by ourselves the whole time. Well that changed real quick!
DJ chewed at the time and had forgotten his chew. So he started asking around for some because they don't sell any on the island of St Lucia. Yes this is how we met our honeymoon friends! We hadn't even been there 24 hours and we had already made lifelong friends. We planned our meals around each other and went site seeing together!
Every year we meet up. Last year "The Honeymooners" came to visit us inSt. Louis. This year we went to Atlanta. Next year will be Texas and then West Virginia. On our 5 year anniversary we all plan to meet up again at an island. It still amazes me today that 4 couples can be drawn to one place and we all get a long so well. God definitely had a plan for all of us to meet up and find each other! We feel like we have known each other our whole lives. We may only see each other once a year but that bond we have never goes away. We just pick up where we left off from the previous year. We are all actually hoping to start meeting up more than 1 time a year of our schedules let us!!!
Perfect Printables
So my little small business is starting to take off. I guess you could call it a business. I'm getting orders so that counts right?!? This has become a hobby for me and I absolutely love it! I love to make someones day special! I love receiving the emails that say "PERFECT" or "I love it, that made me cry". It makes my heart happy and fills me with joy knowing I can make someone happy. I have start a Perfect Primtables blog as well so people can find me on there.
http://perfectprintables.blogspot.com/
I do invitations, announcements, cupcake toppers, thank you cards, labels, food tents and am now starting to do Christmas cards!
Email me at perfectprintables@gmail.com
http://perfectprintables.blogspot.com/
I do invitations, announcements, cupcake toppers, thank you cards, labels, food tents and am now starting to do Christmas cards!
Email me at perfectprintables@gmail.com
Wednesday, May 16, 2012
A Wife After God's Own Heart

I was drawn to this book after reading Blessings by Blog book review on this book. Thanks Ashley! I loved it! I definatly feel this is a must read book for all women who are wanting to be God's woman and wife of excellence and will make you look at your marriage differently (in a better way) after reading this book. It was a life changing book for me. I was lost in the Christian world but after reading this, everything seemed to click and fall into place and I feel it has made me a better wife and mother. This is such an amazing book and great read!
Elizabeth George covers the 12 key areas of your marriage that include:
1. Growing in the Lord.
2. Working as a team
3. Learning to communicate
4. Enjoying intamacy
5. Managing your money
6. Keeping up the home
7. Raising your children
8. Extending love to the family
9. Tending your career
10. Making time for fun
11. Serving the Lord
12. Reaching out to others.
My next book to read will be this one! I didn't even know she had a mom book :) EEEK!! Can you tell I'm excited!

An excellent wife who can find? She is far more precious than jewels. The heart of her husband trusts in her, and he will have no lack of gain. She does him good, and not harm, all the days of her life. She seeks wool and flax, and works with willing hands. She is like the ships of the merchant; she brings her food from afar. ... Proverbs 31: 10-31
Wednesday, May 9, 2012
Wreath #2

So I have attempted wreath #2 and I love this one just as much as the first one. So simple to make. The longest time consuming thing was wrapping the wreath. I forgot to take pictures of everything I had used. Sorry folks! :)
You will need:
* yarn of choice (I pictured it below)
* wreath form
*hot glue and glue sticks
*scissors
*felt
*ribbon of choice
*ribbon of choice
First you take and cut a long piece of yarn because a big bulk of yarn while your wrapping the wreath form really gets in your way. I started it with double sided tape but you could probably hot glue it. I wrapped and wrapped until my strand was gone. I then got more yarn and attached it to the strand that was already wrapped by knotting it on there. You will now have two little strands coming off your knot. I put my finger on them so they would lay flat as I was wrapping it and the wrapping eventually covers it up. The last piece I attached with hot glue. Don't worry if you can see the hot glue. I covered mine up with a flower.
Then make a flower of your choice. I made this one that I found on Pinterest. Hot glue on wreath. I then found ribbon that color coordinated with my yarn and cut a small strip and hot glued it together for a wreath hanger. sYou could also paint an initial to coordinate with your colors.


Monday, May 7, 2012
Matthew 6:34
So today I came across this amazing bible verse that really spoke to me. It is Matthew 6:34
.
I am the biggest worrier there is. I get this worrying trait from my momma! Love her dearly but sometimes this worry makes me have anxiety. Like a lot of it! I struggle with it all day everyday whether it is about money, the weather, or something that is taking place a month from now. I worry about everything. When we went to the zoo the other day, DJ was holding Jackson up in the Penguin and Puffer exhibit close to some water where Jackson could see the animals. What runs through my head? I start freaking that he is going to drop him in the water and I'm going to have to jump in in ice cold water to save my son. Worry much!?! This is how my head works and it drives me insane. DJ would never have or never even could have dropped him in that water. So needless to say I worry too much.
Worry is a part of our everyday life. We all are guilty of it but why? Why do we worry? Will worrying make the situation better? No, in most cases it makes it worse. It makes your mind wander further and further into that little "worry" that is going on inside of your head. We all need to remember to trust that the God who knows our names has our tomorrow's or the next weeks or even months in His hands.
Exercise your faith on a daily basis. When we worry it shows distrust in God. Focusing on tomorrow or next week or next month only robs us of today for we do not know if today will be our last. Live life to the fullest.
Matthew 6:25-34 "Therefore I tell you, do not worry about your life, what you will eat or drink; or about your body, what you will wear. Is not life more important than food, and the body more important than clothes? Look at the birds of the air; they do not sow or reap or store away in barns, and yet your heavenly Father feeds them. Are you not much more valuable than they? Who of you by worrying can add a single hour to his life?
"And why do you worry about clothes? See how the lilies of the field grow. They do not labor or spin. Yet I tell you that not even Solomon in all his splendor was dressed like one of these. If that is how God clothes the grass of the field, which is here today and tomorrow is thrown into the fire, will he not much more clothe you, O you of little faith? So do not worry, saying, 'What shall we eat?' or 'What shall we drink?' or 'What shall we wear?' For the pagans run after all these things, and your heavenly Father knows that you need them. But seek first his kingdom and his righteousness, and all these things will be given to you as well. Therefore do not worry about tomorrow, for tomorrow will worry about itself. Each day has enough trouble of its own."
"And why do you worry about clothes? See how the lilies of the field grow. They do not labor or spin. Yet I tell you that not even Solomon in all his splendor was dressed like one of these. If that is how God clothes the grass of the field, which is here today and tomorrow is thrown into the fire, will he not much more clothe you, O you of little faith? So do not worry, saying, 'What shall we eat?' or 'What shall we drink?' or 'What shall we wear?' For the pagans run after all these things, and your heavenly Father knows that you need them. But seek first his kingdom and his righteousness, and all these things will be given to you as well. Therefore do not worry about tomorrow, for tomorrow will worry about itself. Each day has enough trouble of its own."
"I can do all things through him who strengthens me". Philippians 4:13
Thursday, May 3, 2012
My 1st Wreath

So I had been looking all over Pinterest for a cute yarn wreath. I had an idea in my head and finally found something similar to it on Pinterest and decided to make it! I wanted it hot pink and lime green with our initial on it with some cute little flowers. I bought all of these items from Hobby Lobby.
* Raffia wreath. I bought this instead of a foam wreath because this was bigger. The raffia was also wrapped in plastic so I just kept the plastic on.
* colored yarn of choice
* wooden initial
* colored paint of choice
* felt
* scissors and double sided tape
*cute accent ribbon to hang wreath
*hot glue gun

I first started by painting my "M" hot pink so I knew it would be dry by the time I was finished wrapping my wreath. I then took the yarn and cut a long strand off so I didn't have to hold onto the whole thing while wrapping. The double sided tape holds the yarn in place. I continued to do this until it was completely wrapped. Yes it took me a good 1.5-2 hours to wrap my wreath.
After wrapping, I noticed that there was some spots where you could see through the yarn. I then wrapped those sections again and now you can't even tell!
When finished wrapping I made felt flowers that I had found on Pinterest. If you search for "felt flowers" a ton pop up!
After making the flowers I decided my placement of the "M" and the flowers and hot glued them on. Cut a piece of ribbon, glue it around the top of the wreath and Voila! You now have yourself a super cute wreath!!

Monday, April 30, 2012
I love you because.....
I am doing a Bible Study this summer called The Proverbs 31 Woman: One Virtue at a Time and I absolutely can not wait to start it!
Proverbs 31 is about a woman who loves God so much that every area of her life radiates love, purpose, excellence, and diligent care for her husband and children.
A Virtuous Woman respects her husband. She does him good all the days of her life. She is trustworthy and a helpmeet. (Proverbs 31: 11- 12, Proverbs 31: 23, Proverbs 31: 28, 1 Peter 3, Ephesians 5, Genesis2: 18)
I decided to make this cute little I love you because.....picture frame that you all have seen on Pinterest.

I used a cheap frame from Walmart. 2 pieces of scrapbook paper from Hobby Lobby and black felt.
I placed the scrapbook paper on the inside of the picture frame and I wrote the I love you because with a Vis-A-Vis marker that they use on overhead projectors in schools. I thought it looked kind of plain so I added the felt flowers, and papers flowers as well as making a paper/felt flower rolled up together. I then hot glued the flowers on. I think I will add a rhinestone or 2 to the middle of the flowers to add a little more pizazz to it!
Chicken Spaghetti
So I have had lots of requests on Instagram to blog about this so here it goes. I wish I would have taken a picture of each step but I forgot to! Sorry ladies! I did get this off of Pinterest but added the cream of mushroom soup to mine.

Ingredients
boneless skinless chicken breasts (I used boneless skinless chicken tenderloins and cut in chunks)
1 can cream of mushroom
1 can cream of chicken
1 can of Rotel Red Diced Tomatoes with Green Chiles
8 oz of Velvetta cut in chunks
Onion powder
Garlic Powder
1 tbsp margarine
8 oz of spaghetti noodles ( I think I used 16 oz)
Shredded cheese is optinoal
Heat oven to 350*
Melt butter in skillet. Add chunks of chicken, onion powder and garlic powder. I estimated on the amount of both seasonings. Make sure the chicken is cooked all the way through with no pink!
*I would cook spaghetti noodles as your cooking the chicken*
When chicken is cooked, add soups, Rotel, and chunks of Velvetta. Heat on low until melted. When noodles are finished cooking, drain but do not rinse. Put back into pot. Add chicken mixture to noodles.
Stir together. Place chicken spaghetti into a 9x13 pan. I sprinkled mine with shredded cheddar cheese. Bake until cheese is melted and bubbly. Mine took 15 minutes.
Tuesday, April 24, 2012
Pizza Biscuits

These are absolutely amazing!! I can't take full credit for them. My sister n law Autumn came up with the idea way before Pinterest came about. These are super easy and the kids would have fun making them too!
Ingredients
- cans biscuits (the flaky kind do not work)
1 jar pizza sauce
-1 pkg. mozzarella cheese
- toppings of choice ( I used Canadian bacon and pepperoni)
-muffin/cupcake pan (2 would work great)
-baking sheet

Step 1: Turn muffin tin over so the holes are on bottom. Preheat oven to desired temperature on biscuit can. Pull biscuits apart and flatten them with hand.

Step 2: Place flattened biscuit on top of the muffin tin. I sometimes have to shape them to the tin.

Here is what they all look like on there. This is a can and a half of biscuits.

Step 3: Place biscuits in oven for half of the time the can says. My can said to bake 10-14 minutes so I put my biscuits in for 5.
Step 4: While the pizza biscuit "bowls" are baking, chop and cut up ingredients for inside of pizza biscuits.

Here is what they will look like when they have baked for half of the time. Sorry so blurry!

Step 5: Take biscuit "bowls" off the muffin tan and place on baking sheet.

Step 6: Scoop a spoonful of pizza sauce in bottom of biscuit. (while doing this you need to be baking your other biscuits "bowls" if you haven't done so already.

Step 7: Place desired ingredients in next. I used pepperoni and Canadian bacon.

Step 8: Add another layer of pizza sauce.

Step 9: Top with cheese.

Step 10: Bake for the rest of the time or until cheese is melted. I did mine for 5 minutes.
*I have also made these for breakfast using scrambled eggs instead of pizza sauce, sausage, bacon, green peppers, and topped with cheddar cheese! So delicious!! ENJOY!
Friday, April 20, 2012
Awesome chili!

Here is a recipe for some super amazing chili!
Ingredients
3-4 lbs of hamburger depending on how meaty you like your chili
5 jalapenos (take out the seeds)
1/2 of an onion chopped
3/4 Catalina Salad dressing
3/4 Otts Famous Dressing
2-3 tbsp chili powder
2 can chili beans (we use Bush's)
1 can kidney beans (also use bushes)
1 jar of tomato sauce (this is used to liquify your chili because it is pretty thick)
Chop up your onion and your jalapenos (don't forget to take the seeds out of the jalapenos). Put them in a large pot with the hamburger and brown the meat. Drain grease. Add dressings, beans, and chili powder. Add the tomato sauce at your discrepancy. We used the whole jar because our chili turned out pretty chick. Let simmer for 30 min. Serve!!
Saturday, April 14, 2012
Refrigerator Organization
I had finally had enough of our disastrous refrigerator! It was a mess. Old salad dressings, 3 containers of half eaten salsa, 14 bags of shredded cheddar cheese. I have a bad habit of buying a bag of shredded cheddar cheese every time I go to the store so you can imagine how many were expired! I was over it! I needed to fix our fridge!!
BEFORE

I told you it was a disaster! Look at that hot mess of a fridge! It's actually kind of embarrassing! I started with a trip to Dollar Tree and found cute black and blue bins that are two different sizes. Would have rather had all the bins the same color...OCD kicking in...but oh well! So I bought 5 little blue bins and 4 little black bins. I thought if I didn't use them all I could use them in my classroom or find some other use of organization with them in my house.
I first started with the side door. Took everything off, wiped them down and sorted it. Boy did I throw lots of junk away! Then I moved to the shelves. I took everything off the shelves, wiped them off and then sorted those as well. I decided the top shelf was going to be beverages, the second shelf is misc. items with a bin for salsa, butter, sour cream, etc. There is also a bin for breakfast items such as biscuits, applesauce, pudding, etc. Our next shelf is for leftovers. Under that we have our meat and cheese drawer. The next drawer is for fruits and vegetables. Yes 2 bins fit in there. The last drawer is for meats such a bacon, hamburger, roast, etc.
*My next step is to label each bin.
AFTER

Close up of my fruit and vegetable drawers.

Wednesday, April 11, 2012
Keep Calm It's Almost Summer

Ahhhhhh that sweet 6 letter word that all teachers look forward to! SUMMER! As of today we have 25 1/2 more days left of school. We started MAP testing today so now we are on the down hill slide. Once MAP testing is over comes the field trips, the field days, and reward days. Pure bliss! I can't wait for summer. My little monster is going to be so much fun this summer but will be a real handful when we go camping because he will want to run everywhere! I will worry about that when the time comes!
We will start off the summer with my birthday on May 20th! Then its off to the woods and lake we go! A little camping, a little boating, a little floating, and a little fishing. Sounds like heaven to me!
That's all that is on our summer plates for now. What do you all have planned??
Sunday, April 8, 2012
Happy Easter!!

I hope that you all had a fantastic Easter and ate lots of yummy food! I know we have been eating all week. It was finally nice to sit down tonight just DJ, Jackson and I and relax. I have tomorrow off and that's it till the last day of school which is May 17. YAY!! So excited! Can not wait to be off for three whole months! I hope that you all have an amazing week and you remember to say your prayers and count your blessings!!! Here are a few pictures from this weekend. ENJOY!


My mom made this little rabbit here for all the grandkids for their Easter Baskets. Makes me tear up reading it knowing one day she will be gone.
Wednesday, April 4, 2012
Megan's Recipe Binder
Good Wednesday Morning!!!!! Here we go again. More binders!
So some of your kitchen drawers or cabinents probably looked the same as mine. You know--someone gives you a recipe on paper or you print it off the computer and you have no where to put it but shove it in a drawer or if you were like me I folded it and put it in my recipe cabinent. I had tons and tons of printed off recipes and recipes that people had given me and it was driving me nuts. So I found on pinterest (imagine that) a recipe binder that I knew was just calling my name for me to make!

What you will need :
a 3-ring binder-I used 1 1/2 inches but I think I will be upgrading soon
dividers ( I used Avery)
clear plastic sleeves
cute paper (I got my super cute paisley paper from Office Max)
construction paper--optional
I started by making my tabs off the computer. On www.avery.com you can pick the labels that you bought and it will give you a template to upload in a word document so your labels are just right!

In this picture its hard to see my labels on the tabels but they are there. You can kind of see the word breakfast on the top tab. Here are the tabs I used:
*Breakfast
*Appetizers
*Sides
*Soups/Salads
*Poultry Entrees
*Beef/Pork Entrees
*Crockpot
*Desserts
*Beverages
You are probably wondering where the fish/deer meat receipes are. That's my husbands area of expertise and he just gos with the flow when it comes to cooking deer and fish.
I then started putting all my recipes into the clear plastic sleeves. Some of them I had to retype because they were written in pencil and were starting to fad.
On some of the recipes that weren't a full sheet I cut them down in size and was able to put more than one recipe in a clear plastic sleeve. I used construction paper and tape to make it pretty.

After filling my plastic sleeves with recipes I then got my cute paper out. I tested a piece of white paper in the printer first so I knew which way it would print out so I wasn't wasting any. I then typed up all my sections in Word and printed them out.

Saturday, March 31, 2012
Crockpot Chicken Fajitas
DJ absolutely loves chicken fajitas so I searched and searched Pinterest for a chicken fajitas recipe. Here is what I came up with: Crockpot Chicken Fajitas! via Pinterest
Ingredients:
chicken breasts or chicken tenderloins (I used both because I ran out of breasts)
peppers (I used, red, yellow, and green)
onion
lemon juice (recipe calls for lime but all I had was lemon)
chili powder
cumin powder
salt
1/2 chicken broth
*tortillas, cheese, sour cream, guacamole, hot sauce, salsa*

Not pictured are the peppers and onion
Cut up peppers and onions into strips and place in bottom of crockpot.

I will not do this step next time. Next time I will only put the chicken in the crockpot with the seasonings and broth because we didn't like how soggy the peppers and onions became. I will saute the peppers and onions right before we are ready to eat the fajitas.
After you have cut up the peppers and onions, place chicken breasts or tenderloins on top of peppers and onions.

Pour 1/2 cup broth on top of chicken. I didn't measure the cumin powder, chili powder, or salt. I just eyeballed it. I know not a good cooking trait to have but that's what I do. Sprinkle the seasonings and salt on top of the chicken. Then squirt a little lemon juice on top of the chicken. It should then look like this.

Cook on low for 8 hours. When finished cooking I took out the chicken breasts and shredded them in a separate bowl. I then ladled some of the juice from the crockpot onto the chicken. My intentions were to shred the chicken and then place it back in the crockpot with the peppers and onions but it was very liquidy so I decided against that.
Serve with tortillas, cheese, sour cream, guacamole, salsa, hot sauce or whatever kinds of toppings you want!
ENJOY!
Wednesday, March 28, 2012
Kris' Baked Beans
So I'm sure everyone likes baked beans right? Sometimes its just easier to open a can, throw it on the stove, and call it a side. They are so easy to take to BBQ's too. Well here is an easy recipe for some really amazing baked beans that are always at hit at our house!


Ingredients
2 cans baked beans of choice (I like Bush's Original)
1 tsp Ground Mustard
1/2 cup Ketchup
1/2-3/4 cup Brown Sugar
4 slices of raw bacon
9x13 dish

Place beans in bottom of dish, sprinkle ground mustard, ketchup, and brown sugar over beans. Stir until well mixed. Taste. If its not sweet enough add brown sugar. After making these beans several times I don't measure anything out anymore. I base it strictly on taste. When you have the desired taste place 4 pieces of bacon on top of beans. Bake for 45 min at 350*. The beans will start to simmer around the edge.

Don't let the picture fool you. These beans are truly amazing!
Recipe by my aunt Kris!
Classroom Organization
I LOVE ORGANIZATION! I can't get enough organization in my life, although sometimes it makes my head spin. It's just who I am. Those of you that know me know I have OCD tendencies and love being organized, making labels, labeling things etc. Not only is my house organized but so is my classroom.
I have been teaching now for 4 years and created these weekly drawers for my planning. I get a lot of my students work off the computer because being a Special Education we don't have many resources such as Reading books, math books, etc. All my students are on individualized plans so getting all of their printables off the internet makes it easier for me.......so back to 4 years ago, I created this weekly drawer for when I am doing my weekly lesson plans. I do day by day and when I print something off or need to use a specific workbook I just slide it right in the bin so I don't have to go searching for it the day of! Makes my life so much easier when I get to work in the mornings. No I didn't get this off of Pinterest.....this was so 4 years ago "pre-pinterest" haha!

Also at the beginning of the year I buy packages and packages of pencils for those kiddos that like to stand at the automatic pencil sharpener. Well I hate when they come in plastic packaging. So I comebine them all into one specific spot and my students know they can get one out at anytime. Also in this drawer I put a bucket of erasers for them to use when they wear their pink little eraser out. I also do the same thing with pens and highlighters. The bottom drawer contains flash cards that I have accumulated throughout the past 4 years. And of course its all labeled!!!! Would you expect anything less??

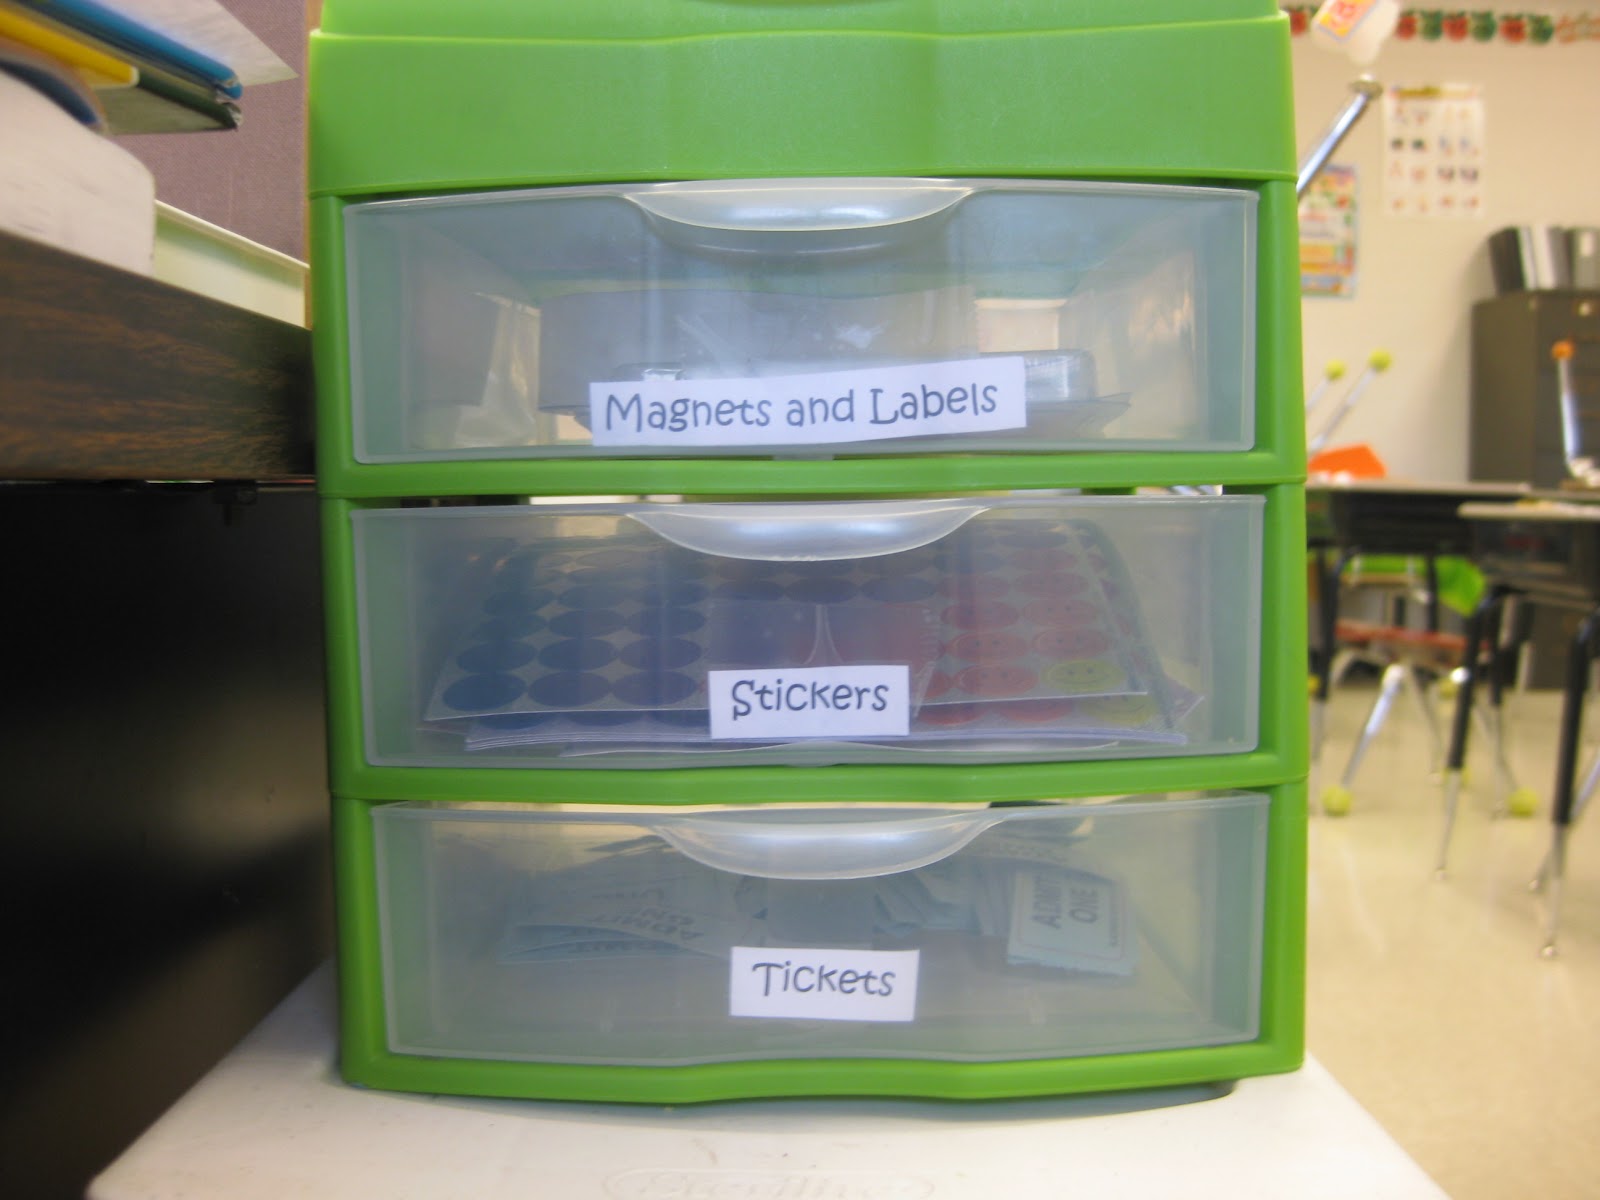
Here is one I made for myself that goes on top of the white drawers. It's for those awesome smelly markers that all the kids love (they are on top), magnets and labels, stickers for our charts and tickets for good behavior and just being awesome in general!
Because I don't have many resource books to use I have 3 different filing cabinets full of reproducible books to use for my kiddos. Of course those are labeled and organized too according to subject on the outside. Once you pull out the drawer it is organized by concepts.


I also have a bookshelf that is full of those printables I get off the internet. They are sorted by subject and inside the binders they are divided into concepts such as time, money, addition, subtractions, etc.

Not only do I do this for myself but I also do it for subs. If there were ever an emergency and I couldn't be there the substitute could pull items from the cabinent or from the shelf and use them for the class that day. Hope I'm not boring you all too much and you find some of this helpful!
Subscribe to:
Posts (Atom)

